React JS
React was created by Jordan walke in the year of 2013, who was a software engineer at FACEBOOK.React is a javascript library for building fast and interactive user interfaces for the web as well as mobile applications.It is an open source,reusable component based front end library.In a model view controller architecture ,react is the "view" which is responsible for how the app looks and feels.
For example INSTAGRAM webpage, which is entirely built by using react.
JSX is a combination of Javascript and HTML.
Basic JSX syntax and understand how it works.
const simple = <h1>Hello World!</h1>;
const simple is a javascript and ; is again a part of javascriptcode and this way you have just inserted HTML into your javascript file.
2.Virtual DOM(Document Object Model):
DOM treats an XML or HTML document as a tree structure to which each node is an object representing a part of document.DOM which is actually defines how documents are access and manipulated in a webpage.It represents a entire structure of webpage in the form of tree.
Virtual DOM is the exact copy of the Real DOM.React keeps a lightweight representation of the Real DOM in the memory and that is known as the Virtual DOM.Manipulating Real DOM is much slower than manipulating virtual DOM.Because nothing gets on the screen.When the state of an object changes only that object in the Real DOM instead of updating all hte subjects..
3.Performance:
In React, your UI is rendered by updating something called as DOM (Document Object Model).In basic layman terms, DOM resembles like a tree like structure of objects and nodes.In React, however, HTML is not the root node of a DOM. In Fact, it is only one single node from the Javascript's prototype chain so that it gets the functions to calculate styles, properties or manipulate the individual nodes.In simpler terms, DOM in React is a standard that defines how you get, update or manipulate HTML elements.
The React DOM knows how to render a page but it is not so intelligent to keep track of each node and components which are updating.
4.One way data binding:
React's one way data binding keeps everything modular and fast.A unidirectional data flow means that when designing a react app you often nest child componemts within parent components.
5.Extensions:
React goes beyond simple UI and has many extensions for complete application architecture support.It provides server side renderingand supports mobile app development.It extended with FLUX and REDUX among others.
React extension with FLUX:
FLUX is the application architecture that FACEBOOK uses for building web applications.FLUX implements uni directional flow which makes it easier to deduce what"s going on.
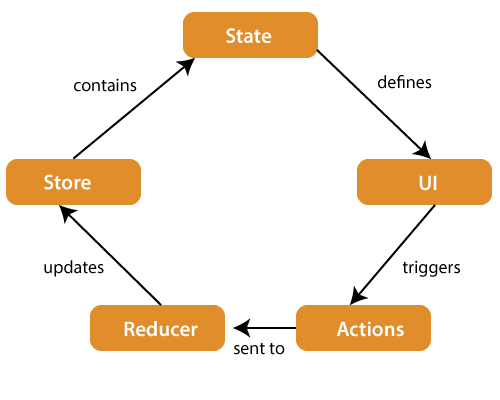
React extension with Redux:

React Flux VS React Redux:
Installation Procedure:
To install react tooling we need nodejs and npm. First let’s understand what these are and why we need them.
What is Nodejs and Why you need for react development?
Node.js is an open-source, cross-platform JavaScript run-time environment that executes JavaScript code outside of a browser. Node.js lets developers use JavaScript to develop wide variety of applications like network applications, command line tools, web api, web applications. You need nodejs for dev tooling (like local web server with live reloading features) and dev experience, you do not need nodejs to run react in production.
What is npm and Why you need for react development?
Npm stands for node package manager, it is a dependency management tool for javascript applications. This tool will help to install and the libraries and other tools to support react development.
Let’s start with nodejs installation post completion on nodejs we will install create-react-app command line and will create a new react project
1.Download nodejs:

- Click on windows Installer to download the latest version of node installer.
2.Install nodejs:
- Click on the downloaded node in previous step to start the installation which brings up below screen. Please click next

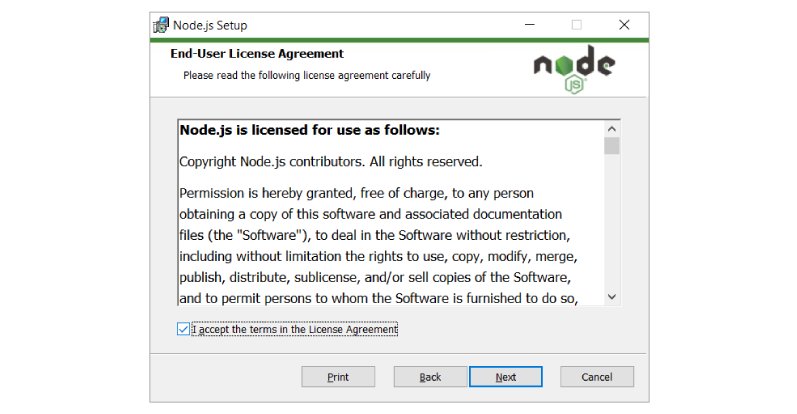
- By clicking next in previous step, you will be asked to accept license, please accept by clicking checkbox and click next

- Click next

- Click next

- Click Install, this may need elevated permissions, provide necessary rights requested. This step would take several minutes to finish installation

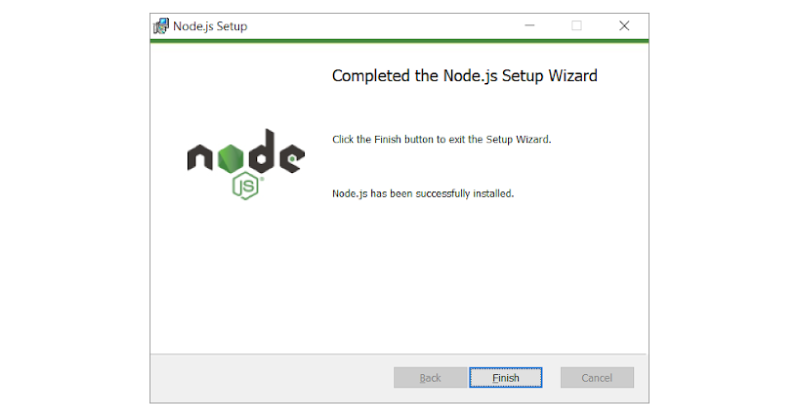
- click finish

3.Testing Installation:
- Open command prompt and run below command to test node.
- node -v
You should see an output like below (Note: Your version may vary depending on your date of installing as nodejs team make an aggressive release but make sure your node version is > v10.0.0)
- Open command prompt and run below command to test npm
- npm -v
- you should see an output like below
Install create react app:
Setting up productive react development environment would need to configure tools like babel, webpack which are complex to configure for a newbie in react world. There are several tools that help to alleviate this problem out of which create react app is the easiest and finest tool with production grade configurations pre-built. The goodness of this tool is, it does not lock in and allows you to alter the configuration by ejecting the create react app.
We will install create-react-app using npm. On terminal run the install command shown below.
npm install g-create-react-app

Test create-react-app:
To test the create-react-app, run below command
create-react-app --version

Congratulations, you have successfully installed create-react-app
Running the first Hello World application:
- Create react application using create-react-app command line using below command
- create-react-app hello-react

This command creates a new folder named hello-react and creates all the files and setups the necessary libraries within this folder and makes the react project ready to be executed without any additional configuration
- Once project is created change into project directory and run application using npm start command as shown below

npm start command starts webpack development server which in turn performs all the build process and opens a browser window and loads application url which runs at http://localhost:3000 by default.
Install visual studio code:
1. Download the Setup File: VS code can be simply installed on Windows 10 with the setup file. So we need to download the setup file from the official website.
After opening the website, click on the Download for Windows button. This will download the VS code Setup Wizard on our system as an EXE file.
2. Run the VS code Setup Wizard:
So the VS code Setup Wizard is downloaded successfully and we need to run it. Run the file by referring to the screenshots provided below.
2.1 Close All Other Applications:
At first, it recommends that we need to close all other applications before the VS code installation starts. It is not mandatory.

2.2 Accept the License Agreement:
In this step, read the license agreement and choose whether we accept it or not. But the installation continues only after we accept the agreement.

2.3 Select the Installation Location:
Choose the location in our system to install the VS Code. If we are not bothering about the location, go with the default location. But, at least 203.4 MB of free disk space is required in the selected location.

2.4 Placing the Shortcuts:
As a default, the VS code shortcut will be placed in the Start Menu folder. We can change the destination or skip creating shortcuts.

2.5 Selecting Additional Tasks:
We get a bunch of additional tasks to be performed before the installation begins. Choose tasks we prefer and continue.

2.6 Install VS code on Windows 10:
So we have set up everything and the VS code can be installed on our Windows 10 system now.

2.7 Finish and Launch
After the successful installation, we can launch the VS code on our system.

Let’s open the project and make some changes to see the experience of this great feature. We will go through the project structure to understand the importance of the file create by create react app.

Open the project which was created in previous step in any JS editor, here you see the project is open in vscode editor. On to the left in explorer section you see file explorer which shows you several folders and files which were created by create-react-app. Let’s walkthrough them
node_modules: This folder is managed by package manager (npm) and contains all the project library dependencies. Files in this folder should not be modified as the changes made are not guaranteed to be safe as updating/installing any other library can overwrite the changes made.
public: This folder contains the assets that should be served publicly without any restrictions and contains files like index.html, favicon, manifest.json
src: This is the folder that contains all your development effort. As a react developer you spent lot of time in this folder creating components and other sources of code.
Now let’s get into the files inside this folder. To start with index.js is the starting file of this project where the execution on your code starts, this file injects App component which is exported from App.js. All the output you see in the browser is resultant on this file, lets make some change to this file,

Save the file and switch back to browser to see the changes deployed and loaded as discussed, this one of the features of create-react-app to tooling setup.
With new changes your browser window should look like below

React components: Components are the building blocks of a react application that represent a part of the UI.Consider the FACEBOOK home page.There are different types of components
1.Credentials component
2.Sign up component
3.Image component
4.Icon component
Notice that each component have something to have the home page looks:
Reusability:
Types of components: They are 2 types of components
1.Stateless functional component:
- They return HTML.
- They are javascript functions.
- Can be contained in .js(or).jsx file
2.Stateful class component:
•Regular classes that extend the component class.
•They must contain a render method that returns HTML.
• Can be contained in a .js (or),jsx file.
Nesting components:
Components have to be nested into the main component using import and export keywords
➡Import feature is used to import a particular module and use it in the existing module
➡Export feature is used to export a particular module and use it in another module
Higher order components:
A high order component is a function that takes a component and returns a new component.It facilitates reusing of component logic
const new component = higher order componet
Pure components:
React component is the base class for react components.Pure component is a variation of react component class and does a shallow comarision of props and state.
Shallow comparision:
Shallow comparision checks for equality in case of scalar attributes,it only compares their values and in case of objects.it only compares their references
React JS props:
Props short for properties allow the user to pass arguments or data to components.
Properties help make components more dynamic.Props are passed to components in the way similar to that of HTML tag attributes
Props in a component are read only and cannot be changed.
React JS state:
State:A state is an object that stores the values of properties belonging to a component that could change over a period of time.
A state can be modified based on the user action or network changes.Everytime the state of an object changes,react rerenders the component to the browser.
The state object is initialized in the constructor.The state object can store multiple properties.
This set state() is used to change the value of the state object.set state() function performs a shallow merge between new and the previous state.
Set state():
State can be updated in response to event handlers,server responses or prop changes.this is done using set state() method.
Top react js interview questions:
1. What are the features of React?
2. What is JSX?
3. What is the virtual DOM?
4. Can web browsers read JSX directly?
5.How do you create a React app?
6.What are the components?


No comments:
Post a Comment